
Planning a kitchen remodel doesn’t mean dropping thousands on a designer, not when you’ve got free online kitchen design tools at your fingertips. Whether you’re sketching a simple layout tweak or mapping out a full gut-and-rebuild, virtual planning lets you test ideas, move appliances around, and preview finishes before you buy a single board or schedule a plumber. This guide walks you through the best free tools available in 2026, shows you how to use them effectively, and helps you bridge the gap between screen and reality.
Table of Contents
ToggleKey Takeaways
- Design my kitchen online free using tools like Planner 5D, Kitchen Planner by Room Sketcher, or SketchUp Free to preview layouts, materials, and finishes before investing in a remodel.
- Accurate measurements of your kitchen space—including dimensions, door locations, plumbing, and electrical outlets—are critical to ensure appliances and cabinetry fit correctly in your design.
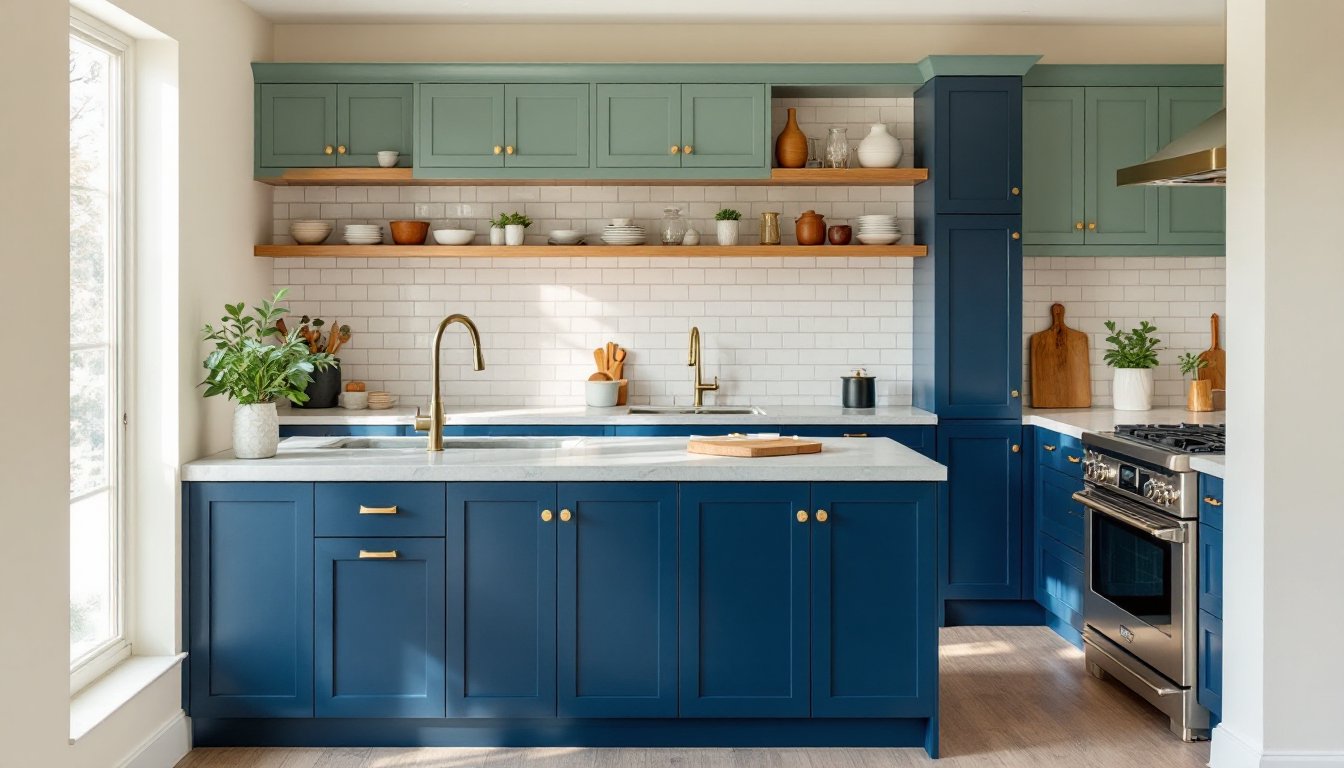
- Test the work triangle (sink, range, and refrigerator placement) and verify that cabinet doors and appliances don’t interfere with traffic flow or each other when opened.
- Material samples of cabinets, countertops, and backsplash tiles in your actual kitchen lighting reveal details that digital previews miss and prevent costly purchasing mistakes.
- Professional help is essential for plumbing relocation, electrical circuit work, structural changes, and permits—tasks that online design tools cannot execute for you.
- Export precise measurements and material lists from your design software, then verify them with suppliers and contractors to catch discrepancies before purchasing or installation begins.
Why Online Kitchen Design Tools Are a Game-Changer for DIY Homeowners
A kitchen remodel is one of the most expensive DIY projects a homeowner tackles, and mistakes get expensive fast. Ordering the wrong cabinet dimensions, committing to a layout that doesn’t work with your appliance placement, or painting yourself into a corner with finishes you hate, these aren’t just design regrets. They’re money and time wasted.
Free online kitchen design software flips that script. You’ll see your space in 2D floor plans and 3D renderings before you invest in materials. You can swap cabinet colors, test different countertop materials, and verify that your new refrigerator actually fits through the doorway. Most tools let you adjust lighting, add or remove islands, and experiment with traffic flow without touching a power drill.
Beyond the visual preview, these platforms serve another critical function: they help you communicate your vision clearly to contractors, electricians, or plumbers if you decide to bring in pros for structural work or rough-in plumbing. A muddy mental picture becomes a concrete set of measurements and specifications everyone can see and discuss.
Top Free Kitchen Design Tools to Get Started Today
The market for free kitchen design software has exploded. You’ve got basic doodlers and sophisticated 3D platforms, some requiring just a web browser and others offering downloadable apps. Here’s what separates the field in 2026.
Best All-in-One Options for Beginners
Planner 5D is a popular starting point. It’s browser-based, free to use at the core level, and handles multiple room types, kitchens included. You’ll find a library of realistic cabinets, appliances, and finishes, and the 3D preview is convincing enough to help you see proportions and spatial relationships. No CAD background required. The downside: advanced customization sometimes pushes you toward the paid tier.
Kitchen Planner by Room Sketcher offers a more streamlined kitchen-specific experience. Upload a photo of your space or create a floor plan from scratch, then drag-and-drop cabinetry, countertops, and appliances into place. Measurements update automatically as you build. The interface is intuitive, though the free version caps some features like custom appliance dimensions.
SketchUp Free (formerly SketchUp Make) is a 3D modeling tool with a gentler learning curve than professional CAD. It’s more open-ended than kitchen-specific tools, which means more creative freedom but also more setup work. A robust library of pre-made kitchen components helps, and thousands of YouTube tutorials walk you through every feature.
Advanced Tools for Detailed Planning
IKEA Home Planner lets you design a kitchen using IKEA’s real cabinetry catalog, a major advantage if you’re actually buying from them. It’s surprisingly capable for a free tool made by a furniture company. You’ll place IKEA cabinets, see accurate dimensions, and even get a shopping list and approximate cost. The trade-off: you’re locked into IKEA components unless you’re willing to manually add non-IKEA items.
Cabinet Vision and ProKitchen are professional-grade software that offer free or heavily discounted versions for homeowners. They’re steeper climbs learning-wise, but the precision is unmatched if you’re doing detailed planning or custom woodworking. Cabinet Vision handles dado joinery details and material take-offs: ProKitchen excels at lighting design and photorealistic renderings.
For visual inspiration before you jump into digital tools, platforms like Houzz and Homify aren’t design software per se, but they’re goldmines for gathering kitchen ideas, seeing real completed projects, and sourcing materials. Save your favorites to a digital board and use them as a reference deck while you design.
Step-by-Step: How to Design Your Kitchen Online
Jumping into a tool without a game plan wastes time. Here’s a practical workflow.
1. Measure your kitchen accurately. Get actual dimensions of the space: length, width, ceiling height, door and window locations, electrical outlets, and any load-bearing walls. For existing kitchens, note the location of plumbing stacks, gas lines, and HVAC returns. Use a tape measure, not a guess. Record everything in inches, standard practice in home design.
2. Choose your tool and input the floor plan. Pick one of the platforms above based on your needs. Most let you manually enter dimensions or upload a photo and trace the walls. Be precise here: small errors compound when you’re fitting cabinetry and appliances.
3. Place fixed elements first. Start with windows, doors, load-bearing walls (don’t move these), and existing plumbing/electrical fixtures. These anchor everything else. If you’re moving a sink, washer hookup, or gas line, flag that as a potential permit or professional contractor job early.
4. Add appliances, then cabinetry. Sketch out appliance placement, refrigerator, range, dishwasher, microwave, etc. Use actual product dimensions (check manufacturer spec sheets). Leave proper clearance: ranges need 15 inches of counter on each side: fridges typically need 1-2 inches of air space for ventilation. Then fill in base and wall cabinetry around them.
5. Test workflow and traffic. Walk through the triangle concept: sink, range, and refrigerator should form a logical work triangle without major obstacles. Check that cabinet doors and appliance doors don’t jam against each other when open. Verify that the island (if you’re adding one) doesn’t block the main walkway.
6. Add countertops, backsplash, and finishes. Once the layout solidifies, layer in colors and materials. Most tools let you switch countertop material, backsplash tile, cabinet finish, and hardware in seconds. Test several combinations: what looks right on your monitor might feel different in person under your actual lighting.
7. Generate measurements and material lists. The best tools output precise takeoffs: how many linear feet of countertop, how many backsplash tiles, cabinet counts and dimensions. Export or screenshot these for your material orders or contractor quotes.
Pro Tips for Creating a Functional and Beautiful Kitchen Design
Tool savvy only takes you halfway. Design thinking gets you the rest of the way.
Clearances and code matter. Check your local building code for kitchen requirements. The IRC (International Residential Code) specifies minimum counter width per appliance, headroom above islands, hallway widths, and outlet spacing. Requirements vary by jurisdiction, yours might mandate GFCI protection on all countertop receptacles, or specify that electrical outlets be no more than 36 inches apart horizontally. Your online design tool won’t enforce these: you have to. When in doubt, consult a local code book or ask at your building department.
Account for cabinet depth and toe-kicks. Standard base cabinets are 24 inches deep (nominal), with a 4-inch toe space underneath. Wall cabinets are typically 12 inches deep. Islands vary but often go 24-36 inches deep depending on your layout. These aren’t trivial, a too-deep island blocks movement: shallow cabinets waste space.
Lighting is structural, not decorative. Most online tools have a lighting feature. Don’t skip it. Plan under-cabinet task lighting above work surfaces (you’ll need 12-18 inches of clearance above the countertop for fixtures), ambient overhead lighting (recessed cans on a 5-foot center grid is standard), and accent lighting if you want it. Poor lighting turns a good design into a dark, claustrophobic kitchen. If you’re running new circuits or circuits with higher loads (induction cooktops draw 30-40 amps), that’s electrical work that needs permitting and a licensed electrician in most jurisdictions.
Material samples trump renderings. Digital previews are helpful but imperfect. Cabinets can look one way on screen and completely different under your actual kitchen light at 7 a.m. and again at dinnertime. Order free samples of cabinet finishes, countertop materials, and backsplash tiles. Hold them against your walls and under your existing (or planned) lighting. One afternoon of sample testing saves you from a costly remorse purchase.
Plan for appliance delivery and installation dimensions. Most design tools include appliance cutouts, but don’t assume your kitchen layout accounts for the physical reality of getting them in. Refrigerators, ovens, and dishwashers need clear pathways and space to maneuver during installation. If your doorway or kitchen opening is narrow, verify that your new appliance fits through it, or budget for a door frame modification.
Bringing Your Virtual Kitchen Design to Life
Your digital model is a blueprint, not a finished kitchen. The translation from screen to room introduces real-world variables.
Know when to call a professional. If your design involves moving plumbing, adding electrical circuits, venting a range hood to the exterior, or removing a load-bearing wall, stop, those jobs require licensed trades and usually permits. Online design tools can sketch the idea, but the actual work isn’t DIY-friendly. Get quotes from contractors and electricians, and factor their labor into your budget. Permit costs vary wildly by location but typically run 1–3% of the total project cost.
Use your tool-generated materials list as a starting point. Export measurements and counts from your design software, but verify them against real products. Cabinet manufacturers sometimes have different dimension standards: countertop pricing varies by edge treatment and material. Take your printout to a kitchen showroom or supplier and ask them to quote the exact components. Discrepancies happen, better caught now than mid-install.
Build in buffer time for material acclimation. If you’re using wood cabinets or solid wood countertops, let them sit in your kitchen environment for a few days after delivery. Wood moves seasonally with humidity changes. A rushed install can lock in stresses that cause warping or finish failures later. It’s boring, but it matters. The Kitchn and similar resources cover prep work and material handling in depth if you’re unsure.
Order finishes with finish in mind. If you’re painting or staining, factor in primer, topcoat, sanding between coats, and curing time. Typical interior paint covers 350–400 square feet per gallon: underestimate and you’ll be back at the supply store. If you’re doing a polyurethane or lacquer finish on cabinetry or wood, ensure proper ventilation, these products off-gas and require good air circulation while they cure.
Take a photo before you start. It sounds silly, but having a before shot grounds you emotionally and gives you perspective when you’re mid-project and covered in dust, questioning every decision. Plus, the before-and-after comparison is genuinely satisfying.