Adding smart home electrical wiring to your house might sound like a job for a licensed electrician, but many DIY homeowners can handle the basics, especially if you plan ahead and respect the limits of your skill level. Smart home electrical wiring differs from traditional setups because it demands cleaner infrastructure, better-organized circuits, and consideration for low-voltage systems running alongside standard power lines. Before you flip a breaker or drill into a wall, you’ll want to understand what you’re dealing with, what tools matter, and when to call a pro. This guide walks you through the essentials so you can wire your home for a connected future without shortcuts or regrets.
Table of Contents
ToggleKey Takeaways
- Smart home electrical wiring requires a dual infrastructure layer combining power delivery with low-voltage data cables (Cat6 or Cat5e), separated by at least 12 inches to prevent interference and safety hazards.
- Proper planning—including circuit mapping, device selection (WiFi-only vs. wired backbone), and cable route sketching—is essential before installation to avoid costly mistakes and code violations.
- DIY homeowners can handle basic smart switch and outlet installations by turning off breakers, testing for power with a voltage tester, and correctly connecting hot, neutral, and ground wires to the appropriate terminals.
- Smart home electrical wiring demands organized infrastructure with proper labeling, conduit placement, and adherence to NEC codes; mixing power and data cables in the same space without shielding risks data corruption and equipment damage.
- When in doubt, consult a licensed electrician for $100–150; many jurisdictions permit homeowner work but require professional inspection before closing walls, catching code violations early and preventing fire or electrocution risks.
- Essential tools and materials—voltage testers, Cat6 cabling, low-voltage boxes, wire strippers, and cable management supplies—combined with a structured wiring approach creates a more reliable smart home network than WiFi alone.
Understanding Smart Home Wiring Fundamentals
What Makes Smart Wiring Different
Traditional home wiring focuses on delivering power from the breaker panel to outlets and switches. Smart home wiring adds a second layer: low-voltage data lines (typically Cat6 or Cat5e cabling) that carry signals for communication between devices. Your smart speaker, doorbell camera, and controllable lights all need power, but they also need a data backbone to talk to each other and your phone.
This dual infrastructure is the core difference. A standard outlet delivers 120V AC power: a smart outlet does the same but also includes electronics that connect to WiFi or a local hub. The real challenge arises when you’re running Cat6 cables through walls alongside live electrical wiring. National Electrical Code (NEC) rules require physical separation between power and low-voltage lines to avoid interference and safety issues. In practice, this means keeping data cables at least 12 inches away from power wiring, or using shielded twisted-pair cabling if closer proximity is unavoidable.
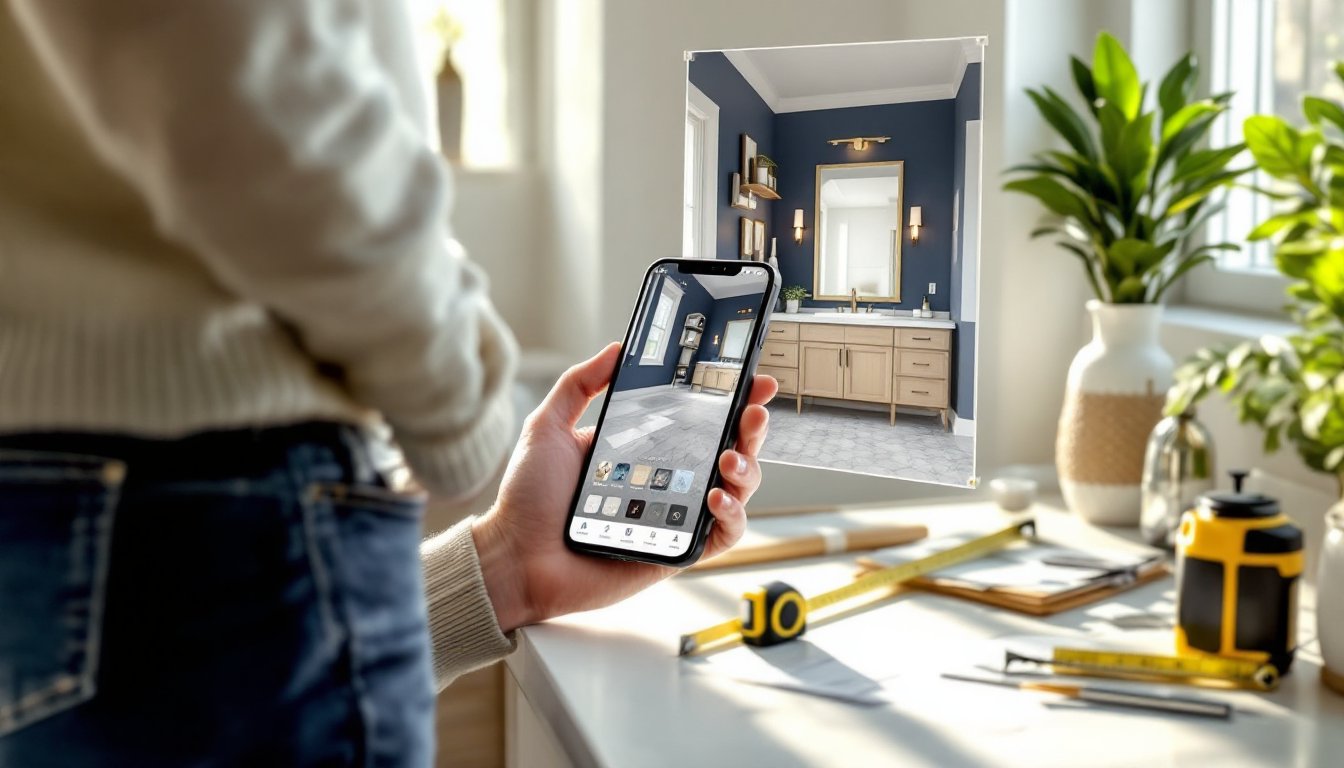
Many modern smart setups rely on WiFi, which sidesteps extensive wiring work. But, a structured wiring approach, with dedicated Cat6 runs and a central hub, creates a more reliable, faster network than scattered WiFi alone. Think of it as the difference between using a extension cord for one lamp versus installing proper outlet placement throughout a room.
Essential Tools and Materials You’ll Need
Before you start pulling cable or touching a breaker, gather the right gear. You’ll need basic electrician tools: a non-contact voltage tester (essential for confirming power is off), a multimeter, needle-nose pliers, wire strippers, and a flashlight or headlamp. A stud finder saves hours of wall probing, and a drill with a 3/4-inch spade bit handles most cable runs through wall cavities.
Materials list includes Cat6 cabling (solid copper, not patch cable), low-voltage boxes for housing wire terminations, wire nuts, electrical tape, and drywall anchors or in-wall conduit if you’re running surface cable. If you’re replacing existing switches or outlets with smart versions, you’ll need the devices themselves, make sure they fit your existing box depth (a smart switch often requires a deeper box than a traditional toggle switch).
For safety, stock heavy-duty work gloves, safety glasses, and a dust mask if cutting into drywall. Ear protection matters when drilling. If you’re working near aluminum wiring (common in older homes built 1965–1970), you’ll need special connectors rated for aluminum and copper, copper-aluminum mixing causes corrosion and fire risk.
Other helpful items: a fish tape for pulling cable through tight wall cavities, a cable tray for organizing runs in attics or crawl spaces, and a label maker for marking breaker assignments. Smart home wiring rewards organization: poor labeling leads to confusion and costly mistakes later.
Planning Your Smart Home Electrical Layout
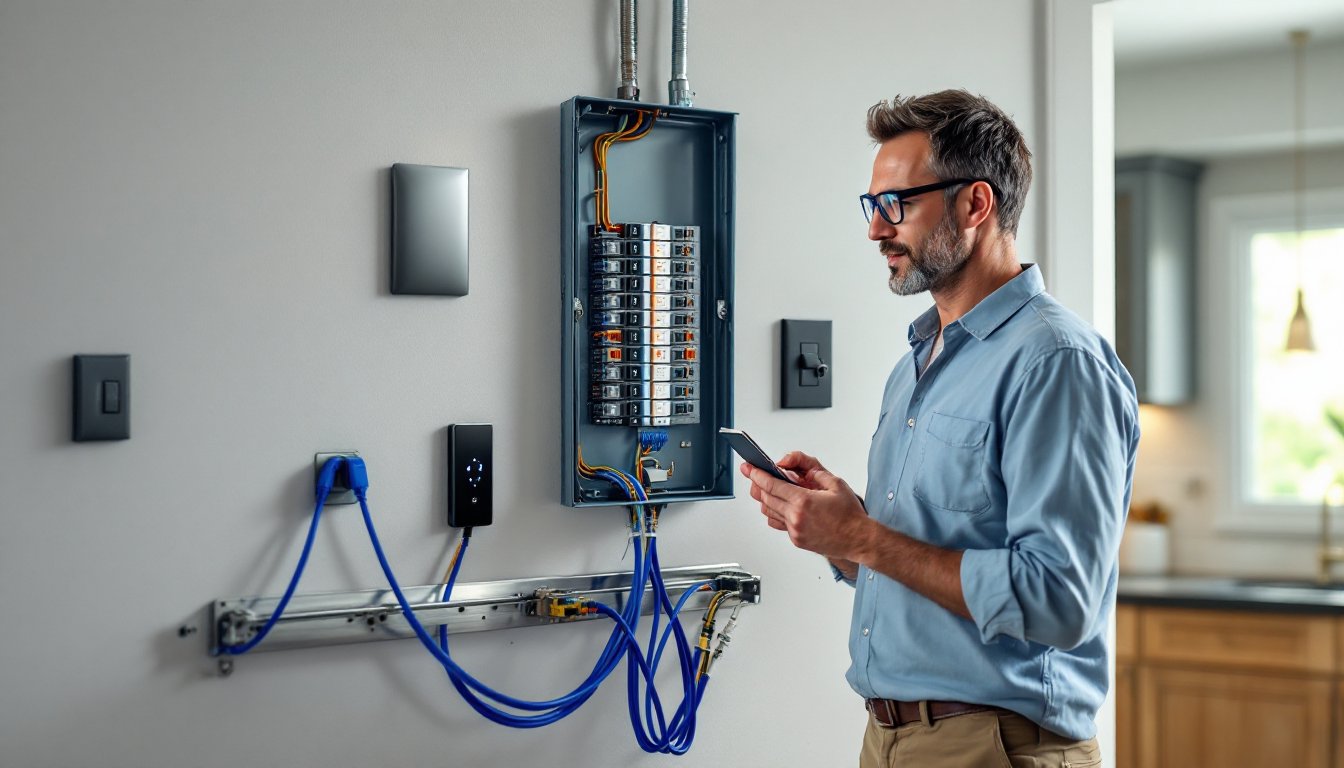
Layout planning separates smooth projects from disasters. Start by mapping your existing circuits and identifying which outlets and switches you want to upgrade. Pull your electrical panel cover (with power on, since you’re just looking) and photograph or note each breaker’s amperage and what it controls.
Decide whether you’re using WiFi-only smart devices or a wired backbone. WiFi-only is simpler and cheaper, no cable runs needed, but vulnerable to interference and dead zones. A structured wiring approach costs more upfront but ensures consistent performance. If you choose wired, plan cable routes to minimize drilling and avoid crossing live power lines. Run Cat6 from a central patch panel (typically located near the breaker panel or a closet) to each room where you want smart devices.
Measure twice, plan once: sketch your home layout, mark outlet locations, and estimate cable lengths. Account for slack, you’ll want 10–15% extra cable for termination and future rework. Local building codes may require permits for electrical work: check with your local authority before starting. Many jurisdictions allow homeowners to wire their own homes but require inspection before closing walls or turning on circuits.
Consider future expansion. If you’re running Cat6 now, also run empty conduit alongside it for potential additional cable. Conduit is cheap insurance against ripping open walls later. Finally, group smart devices by zone (kitchen, bedrooms, living areas) so each zone can be controlled independently or automated together.
Installation Basics for Common Smart Devices
Smart Switches and Outlets
Smart switches and outlets are the most common DIY smart installs. Before touching anything, turn off the breaker for that circuit at the panel and confirm power is off with your non-contact voltage tester. Test the tester on a live outlet first to verify it’s working.
At the outlet box, unscrew and pull out the existing device carefully. Switches and outlets are fastened to the box with two screws: removing them exposes three wire terminals: hot (black), neutral (white), and ground (green or bare copper). Your smart switch or outlet connects the same way, but it’s likely bulkier than a traditional one. Check the device’s depth requirement, if it extends 1.5 inches or more, you may need a deeper box (a simple retrofit box sits in front of the existing one).
Wire the smart device: connect hot to the brass terminal, neutral to the silver terminal, and ground to green. If the device has a load wire and a line wire (labeled on the back), line goes to the incoming hot, and load goes to the outgoing circuit. Use wire nuts to bundle any extra wires, and use the electrical tape to secure them. Tuck everything into the box carefully, crowding wires creates fire risk and makes it hard to close the cover.
For outlets with multiple smart devices stacked on a single circuit, load each one in series: line to the first, load to the next device’s line, and so on. If you’re installing a smart hub or control panel, mount it in a central, accessible spot, a closet or utility room works well. The smart home device setup process is straightforward once the wiring is live.
One common pitfall: over-tightening terminal screws. Snug, not gorilla-tight. Another: forgetting to test each outlet individually before closing the wall or declaring it done. Plug in a lamp and confirm the smart switch responds to commands, a five-minute test now prevents hours of troubleshooting later.
Safety Considerations and Best Practices
Smart home wiring is still electrical work: mistakes can cause fires, electrocution, or damage to equipment. Start by respecting the breaker panel as a live, dangerous space. Never work on the main panel itself, that’s a job for a licensed electrician. You can safely work on individual circuits if you turn off the breaker, test for power, and follow basic protocols.
Never mix power and data cables in the same conduit or box unless they’re shielded and rated for it. Power and data use different frequencies: interference corrupts data and can damage smart devices. Keep power runs at least 12 inches from Cat6 lines. If they must cross, do so at a right angle (90 degrees), not parallel.
Use approved smart switches and outlets that meet UL (Underwriters Laboratories) standards. Cheap knock-offs may lack proper insulation or safety certifications. Check your local electrical code, codes vary by jurisdiction, and some areas restrict how homeowners can wire. Many jurisdictions require a licensed electrician for work involving the main panel, dedicated circuits, or load calculations.
For low-voltage work (Cat6, control wiring), you have more freedom, but still follow best practices: secure cables with proper clips every 18 inches, avoid sharp bends (Cat6 has a minimum bend radius of about 1 inch), and use conduit or raceways if running cable in accessible areas where it could be damaged. Label everything. Your future self will thank you.
When testing, work daytime so you can see what you’re doing. Never assume power is off, always test with a voltage tester. The smart home innovations in today’s market often rely on reliable wiring. Properly installed circuits reward you with years of trouble-free operation. Shortcuts create callbacks.
If you’re uncertain at any point, call a licensed electrician. The cost of a consultation (typically $100–150) is cheap compared to fixing electrical damage or risking injury. Most electricians are happy to work with DIYers who’ve done prep work and know their limits. Many jurisdictions also allow inspectors to review homeowner work before you close walls, take advantage of this oversight. According to comprehensive smart home wiring guides, professional review can catch code violations early.