Bathroom tile design is more than just picking colors and shapes, it’s the foundation of both function and aesthetics in one of the most-used rooms in your home. A well-chosen tile layout can make a cramped bathroom feel open and airy, while poor selections amplify clutter and moisture issues. Whether you’re tackling a full renovation or refreshing a single wall, understanding timeless patterns, smart color choices, and practical installation methods ensures your project survives years of daily wear without regrets. This guide walks through the tile options that work hardest in small spaces, giving homeowners the confidence to plan and execute a bathroom tile project that’s both beautiful and built to last.
Table of Contents
ToggleKey Takeaways
- Simple bathroom tiles design using light neutrals and subway tiles creates a timeless look that resists dating and stays fresh across design trends for 10–15 years or longer.
- Strategic tile patterns—horizontal layouts for width, vertical stacks for height—paired with matte finishes hide water spots and make small bathrooms feel larger and more open.
- Proper underlayment, waterproofing, and high-quality ceramic or porcelain tile prevent mold, water damage, and costly repairs while ensuring durability in high-moisture bathroom environments.
- Grout selection impacts both aesthetics and longevity: light grout expands perceived space in small bathrooms, while sealed grout lasts 5–10 years before requiring resealing to prevent staining and mold.
- DIY tile installation requires careful surface prep, centered layout planning, and appropriate trowel and mortar selection, but licensed professionals should handle structural issues, permits, or plumbing conflicts.
- Maintenance of simple tile designs is straightforward—squeegee walls after showers, use pH-neutral cleaners, and store 10–15% extra tile for future replacements to maintain a cohesive appearance.
Why Tile Design Matters for Bathroom Renovations
Bathrooms are high-moisture environments where tile serves dual purposes: moisture barrier and visual anchor. Unlike other rooms where wall color can be repainted in an afternoon, bathroom tiles commit you to a look for 10–15 years or longer. A poorly chosen design dates quickly, while timeless patterns stay fresh across design trends.
Small bathrooms especially benefit from strategic tile choices. The right pattern and color expand perceived space, while cramped layouts become claustrophobic with the wrong selection. Tile also handles moisture far better than paint or wallpaper. Installing quality tile with proper underlayment and grout prevents mold, water damage to framing, and costly repairs down the road.
Tile is also forgiving once installed. Chipped or cracked tiles in a small bathroom are more visible, so durability and finish quality directly impact the longevity of your investment. Choosing durable ceramic or porcelain over softer materials, and selecting matte finishes that hide water spots over high-gloss, keeps maintenance realistic for busy households.
Timeless Tile Patterns for Every Budget
Subway Tiles: The Minimalist Classic
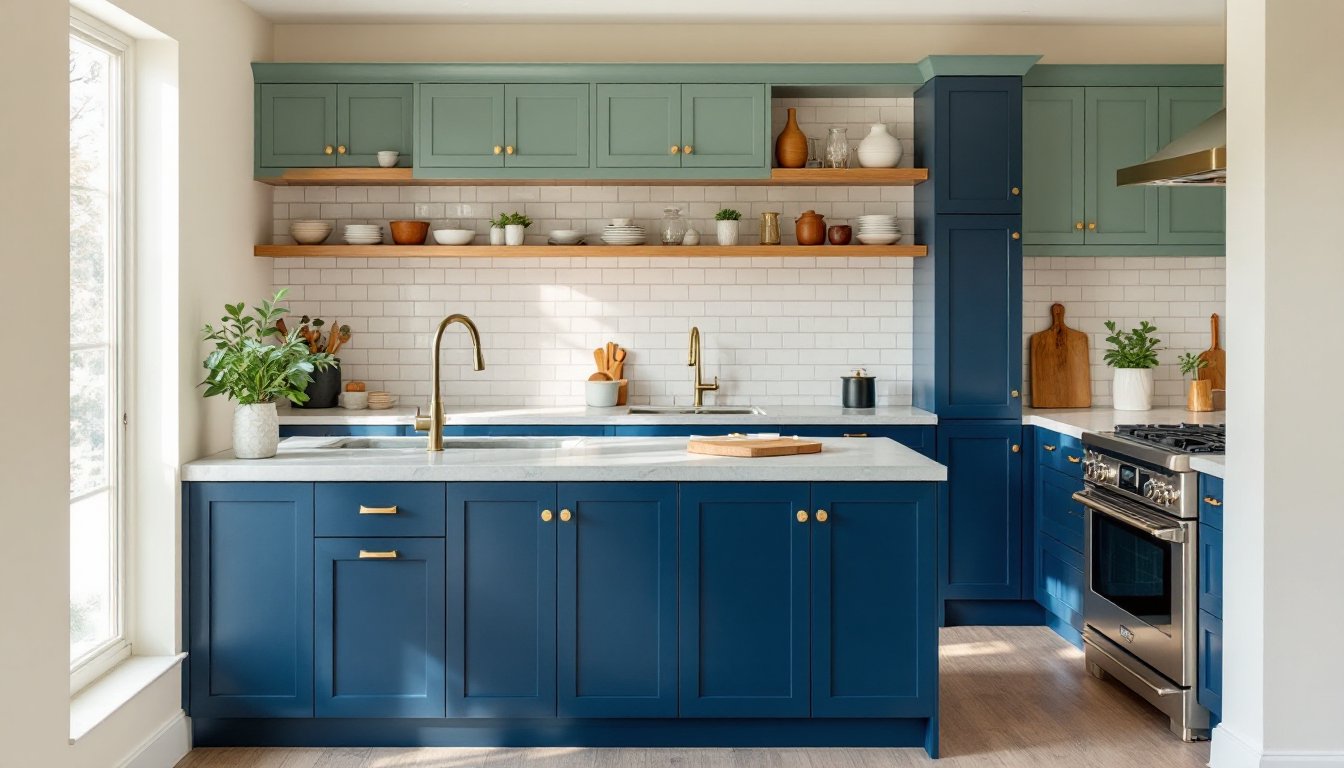
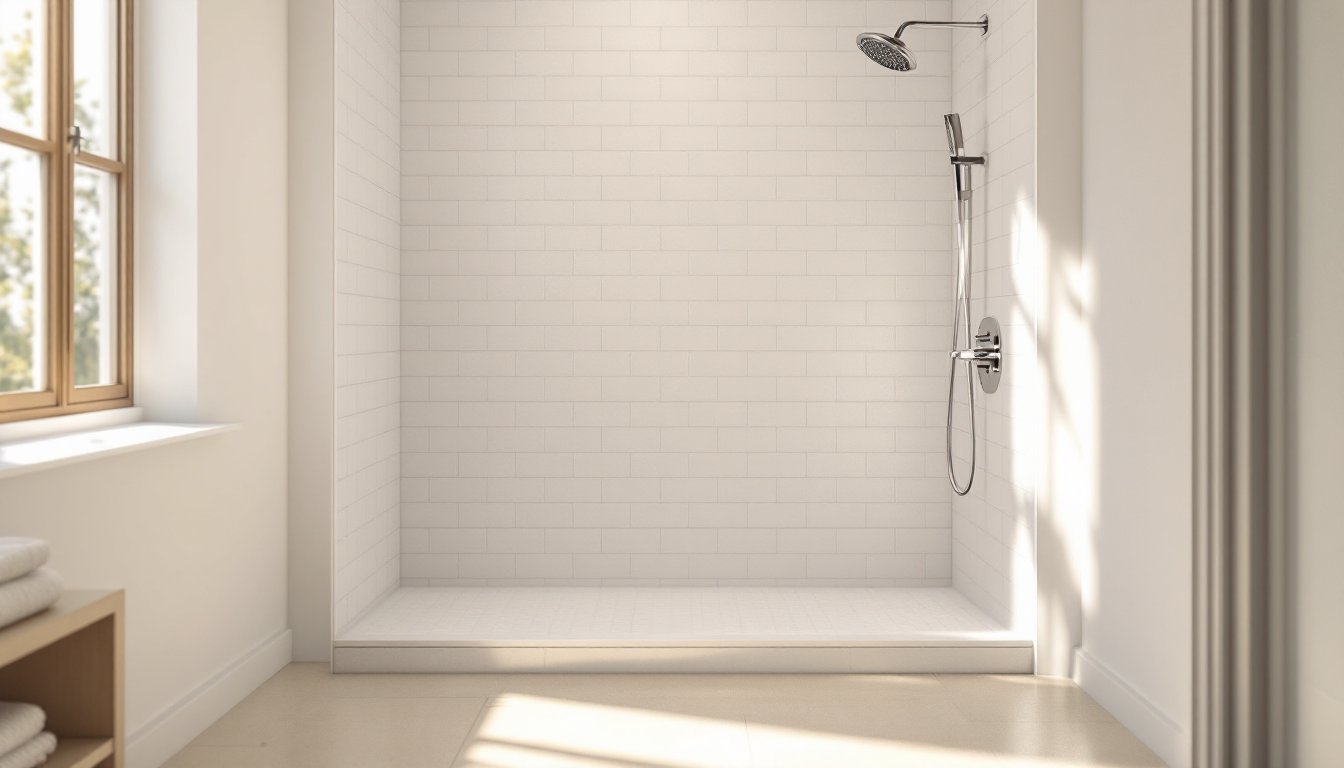
Subway tiles, the 3×6 inch rectangular tiles that line countless bathrooms worldwide, remain popular because they’re affordable, versatile, and genuinely timeless. A single-color subway layout in white or light gray is the safest bet for small bathrooms. Horizontal layouts feel wider, while vertical “stack bond” arrangements add height to low ceilings.
Where many DIYers stumble is the finish. Matte or satin-finish subway tiles hide water spots and fingerprints far better than glossy versions, which show every drip. Cost ranges from $2 to $8 per square foot for ceramic subway tiles: porcelain costs more but withstands moisture better in steamy bathrooms.
Subway tile’s strength is flexibility, pair it with a contrasting grout color for subtle definition, or keep grout close to tile color for seamless flow. Many homeowners frame a simple subway wall with a border or accent row in a complementary color without overwhelming the space.
Hexagonal and Geometric Tiles
Hexagonal tiles (typically 1 to 2 inches across) and other geometric shapes inject personality without feeling trendy. Mosaics of small hexagons in soft neutrals or pastels create visual interest while maintaining the calm, open feel small bathrooms need. These tiles cost $4 to $12 per square foot and require more precision during installation due to varied edge angles.
Geometric patterns work best as accent walls or shower surrounds rather than covering all surfaces. A floor of large-format neutral tiles paired with geometric wall accents balances visual weight. Keep color palettes to two or three tones, mixing too many colors in geometric layouts shrinks the perceived space.
Color Palettes That Make Bathrooms Feel Larger
Light neutrals, soft whites, creams, pale grays, and warm beiges, are standard for small bathrooms because they reflect light and create visual continuity. A monochromatic approach (varying shades of the same color) feels cohesive and spacious without requiring a designer’s eye.
For bathrooms with natural light, pale blues and greens evoke calm and refresh without the coldness of pure white. These work particularly well with matte finishes that soften the overall feel. Avoid dark tiles in small spaces unless they’re strictly accent pieces, a dark tile feature wall in a 5×8 bathroom consumes space visually and traps light.
Grout color shifts perception too. Light grout matching tile color creates seamless flow and makes rooms feel larger. Contrasting dark grout (like charcoal or black) defines tile edges and works in modern, minimalist designs but visually breaks up space. In small bathrooms, save dark grout for small accent areas only.
Texture plays an underrated role, slight surface variation in matte tiles adds depth without the visual weight of color. This approach keeps bathrooms feeling open while avoiding the sterile look of perfectly flat, glossy surfaces.
Design resources like Houzz’s floor tile options guide and Remodelista’s bathroom inspiration galleries showcase how professional designers balance color and pattern in compact spaces.
Practical Installation Tips for DIY Tile Projects
Before buying tile, prepare surfaces properly. Walls and floors must be level, clean, and dry. Check for structural issues, water-damaged drywall needs replacement before tiling. Use cement board or waterproofing membrane behind shower and tub walls: standard drywall fails in wet zones.
Measure twice, cut once. Start tile layouts from the center of walls outward, so cuts at corners and edges are balanced and minimal. Avoid slivers, if layout leaves a gap smaller than half a tile width, adjust the starting point so cuts are larger.
Use the right thinset mortar for your tile type. Polymer-modified thinset works for most ceramic and porcelain tiles on walls and floors. Mix only what you’ll use in 30 minutes, dry thinset wastes money and creates weak bonds. Spread with a notched trowel (the notch size matches tile size: typically 3/8 inch for small tiles, 1/2 inch for larger) at a 45-degree angle.
Grout matters as much as tile. Unsanded grout (for grout lines 1/8 inch or narrower) stays smooth: sanded grout (for 1/8 inch and wider) resists cracking and settling. Seal grout after 72 hours with a penetrating sealer to prevent staining and mold, especially critical in bathrooms.
PPE is non-negotiable: wear dust mask when cutting tile (silica dust causes lung damage), eye protection, and gloves. Wet saws minimize dust better than angle grinders. A second pair of hands makes alignment easier: tile work is a two-person job for first-timers. If structural issues, permits, or plumbing conflicts arise, bring in a licensed installer, bathroom tile isn’t the place to learn by costly mistake.
Check local building codes before starting. Many jurisdictions require permits for bathroom renovations and inspect waterproofing before drywall closes walls. A statement tile design approach can elevate a simple install, but only if underlying prep meets code.
Maintenance and Longevity of Simple Tile Designs
Simple tile designs age better because they don’t rely on trendy colors or fussy patterns. White, gray, and neutral subway tiles look intentional whether installed in 2016 or 2026. Geometric accents in muted tones don’t age as dramatically as bold jewel-tone mosaics.
Daily maintenance is straightforward: squeegee shower walls after use to prevent soap scum and hard water stains, and wipe spills before they set. Avoid abrasive scrubbers on tile surfaces (they dull finishes), and use pH-neutral cleaners, vinegar and water works, but avoid bleach on grout over time as it breaks down sealant.
Grout is the weak point. Properly sealed grout lasts 5–10 years before needing resealing. Unsealed grout stains, molds, and crumbles within 2–3 years in high-moisture bathrooms. Plan to reseal every few years: it’s cheaper than regrouting.
Chipped or cracked tiles in visible spots may need replacement. Matched tile from the same production run blends seamlessly: mismatched replacements stand out. Buy 10–15% extra tile during installation and store in a dry place for future repairs.
Waterproofing and proper ventilation protect tile longevity. Use exhaust fans during and 20 minutes after showers to remove moisture. Poor ventilation shortens both tile life and the life of framing behind walls. Freshome’s interior design guides and similar resources offer practical bathroom ventilation tips alongside design inspiration.